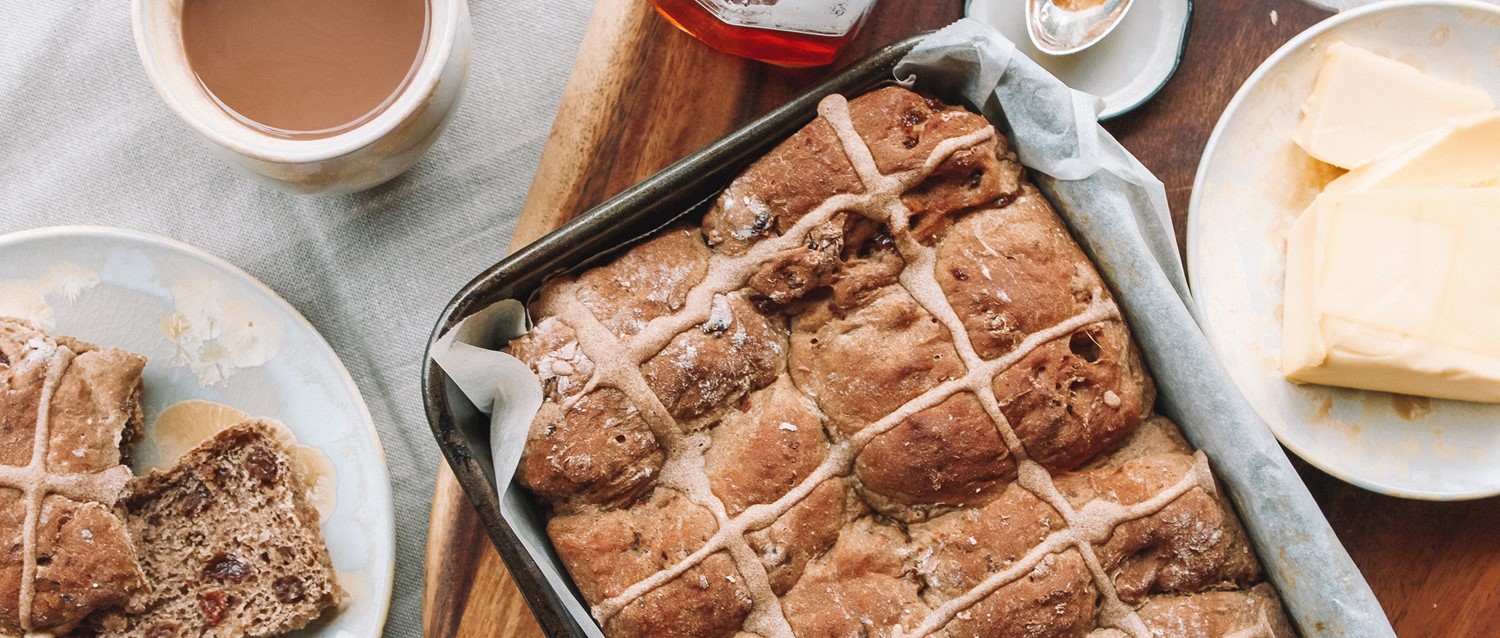
Receita: Pães de cruz quente sem glúten
Revisado por Dr Sarah JarvisÚltima atualização por Val StonesÚltima atualização 26 Mar 2018
Atende aos diretrizes editoriais
- BaixarBaixar
- Compartilhar
- Language
- Discussão
- Versão em Áudio
- Adicionar às fontes preferidas no Google
I have a sister-in-law and two nieces who are coeliac and I make these buns for them as an Easter treat. They love them warmed up with a spread of butter or jam.
The best thing about these buns is that they can also be frozen for up to a month, so you can enjoy a delicious, gluten-free treat any time
Nutritional info
Gluten-free alternatives are very readily available nowadays, meaning that those who have intolerances can still enjoy the food they love.
If you do have doença celíaca, but share a kitchen with someone who does not, make sure all the work surfaces/equipment you use are perfectly clean. This will help to prevent cross contamination.
How to make gluten-free hot cross buns
Makes 12 buns
Ingredients
450 g gluten-free white bread flour (plus extra for dusting)
70 g unrefined caster sugar
2 tsp mixed spice (8 g)
1 tsp cinnamon (2 g)
¼ tsp freshly grated nutmeg
10 g fine sea salt
12 g dried yeast
50 g butter or margarine
150 ml semi-skimmed milk
1 medium egg lightly beaten
40 g sultanas
100 g grated apple
Zest of an unwaxed orange
Zest of an unwaxed lemon
Olive oil (for greasing)
For the crosses
80 g gluten-free flour
100 ml water
For the glaze
60 ml milk and water (half and half)
30 g unrefined caster sugar
1 tbsp apricot jam (optional)
Baking tools
2 lightly greased baking sheets lined with parchment.
A medium plastic bowl.
A disposable piping bag and a 3 mm nozzle/tip - if you haven't got this nozzle you can fill the piping bag with the flour-and-water cross mixture and snip off the end to create a small hole for piping.
Large tumbler to support the piping bag.
Método
Sift the flour, sugar, mixed spice, cinnamon and nutmeg together into a large bowl. Place the salt on one side of the bowl and the dried yeast on the opposite side.
Heat the butter/margarine in a pan until melted (you can also do this in the microwave). Allow to cool slightly.
Place the 150 ml of milk in a heat-proof measuring jug, before adding boiling water to bring the level up to 300 ml - this will give you a warm but not hot liquid. Allow to cool slightly.
Make a well in the flour mixture and pour in the melted butter, half the milk mixture and the egg.
Use your hand to bring the mixture together, turning the bowl as you bring the mixture in from the edges.
Pour in the sultanas, grated apple, orange and lemon zest. Continue to mix well.
Gradually add more of the milk until you have a fairly soft dough. The dough is better for being slightly wetter than too dry.
Lightly dust the work surface and knead the dough for about 10 minutes or until the dough is smooth and elastic. I usually find this takes about 500 turns.
Oil a large bowl, form the dough into a ball and place inside. Cover with clingfilm and put in a warm place to rise for about 1-1½ hours or to about doubled in size.
Turn the risen dough out on to a lightly floured surface and knead out some of the larger air bubbles (this is called 'knocking back') before kneading a little more.
Divide the dough into 12 equal pieces. If you want 12 identical buns then simply weigh the dough and divide by 12.
To shape each bun into a round with your hands, turn the dough a quarter turn pulling the edge of the dough into the middle. Do this several times. Place your fingertips on the work surface and form your hand into a dome; rotate your hand to form the bun into a nicely formed, smooth round.
Place the buns on the baking sheet making sure they are placed well apart. (About six per sheet.) Place each baking sheet in a large clean polythene bag, making sure the bag doesn't touch the buns. Leave to rise for about 40 minutes or until the buns have doubled in size.
Set the oven for 220°C, 200°C fan-assisted oven, Gas Mark 7.
Whilst the dough is rising make the paste for piping the crosses. Place the plain flour in a bowl and gradually add the water until you have a not too soft paste that will squeeze easily from the nozzle but not run out freely.
Fill a disposable icing bag with this mixture.
When the buns have risen remove the polythene bag, snip the end off the piping bag and pipe a cross on each bun.
Place the buns in the oven and bake for 15-20 minutes until golden brown and firm to touch. Check on the buns half way through the bake and turn the baking sheet if the buns are over-browning on one side.
Whilst the buns are baking prepare the glaze. Heat the milk and water with the sugar and apricot jam.
When the buns come out of the oven and are still warm, brush them twice with the glaze. Leave on a cooling rack to cool.
Escolhas do paciente para Receitas
Dieta e nutrição
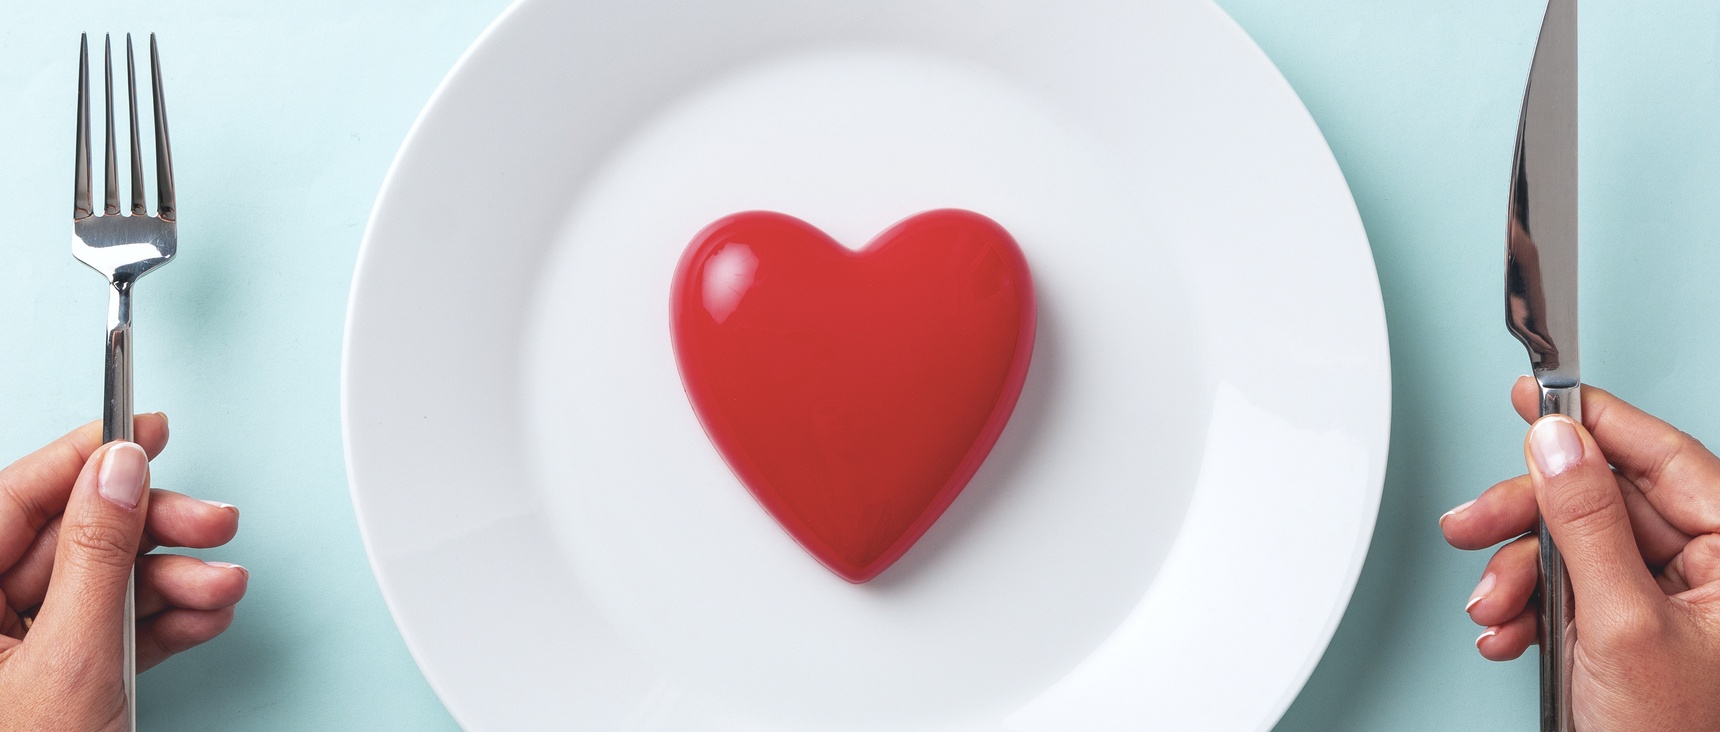
Alimente-se para um coração saudável: ideias de receitas saborosas para cada refeição
Cuidar bem do seu coração é vital para a sua saúde. Exercitar-se regularmente, parar de fumar, reduzir o consumo de álcool, dormir bem e controlar o peso podem ajudar a manter o coração saudável. No entanto, uma das maneiras mais importantes de apoiar um coração saudável é comer uma variedade equilibrada de alimentos saudáveis.
por Victoria Raw
Dieta e nutrição
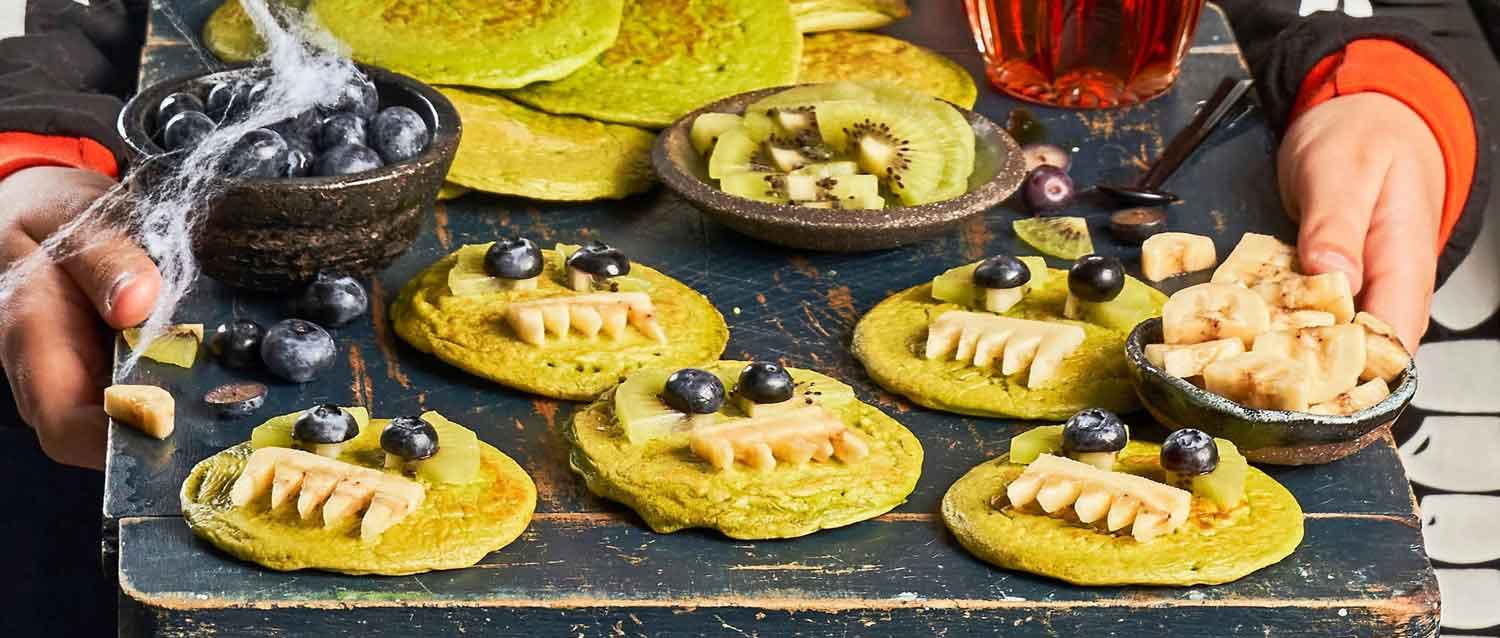
5 guloseimas saudáveis para o Halloween
Ninguém quer ser o vizinho que distribui frutas simples em vez de doces para as crianças na brincadeira de travessuras ou gostosuras, mas e se você pudesse tornar as guloseimas saudáveis de Halloween mais divertidas e atraentes para as crianças — ou para seus amigos e familiares com vontade de doces?
por Amberley Davis
Sobre o autorVer biografia completa
Val Stones
Padeira, Desenvolvedora de Receitas
Val competed on the Great British Bake Off in 2016 and quickly won the hearts of the nation with her homely bakes.
Sobre o revisorVer biografia completa

Dra. Sarah Jarvis
Consultora Clínica
MA (Cantab), BM, BCh (Oxon), DRCOG, FRCGP, MBE
Após se formar em medicina em Cambridge e Oxford, a Dra. Sarah Jarvis MBE tornou-se médica de clínica geral.
Histórico do artigo
As informações nesta página são revisadas por pares por clínicos qualificados.
Artigo também disponível em Inglês, Alemão, Espanhol, Francês, Italiano, Português, Hindi, Hebraico, Árabe, e Sueco.
26 Mar 2018 | Última versão

Pergunte, compartilhe, conecte-se.
Navegue por discussões, faça perguntas e compartilhe experiências em centenas de tópicos de saúde.

Sentindo-se mal?
Avalie seus sintomas online gratuitamente
Inscreva-se no boletim informativo do Patient
Sua dose semanal de conselhos de saúde claros e confiáveis - escritos para ajudá-lo a se sentir informado, confiante e no controle.
Ao se inscrever, você aceita nossos Política de Privacidade. Você pode cancelar a inscrição a qualquer momento. Nunca vendemos seus dados.
Mais sobre dieta e nutrição
- 12 dietas confiáveis para suas metas de ano novo
- 5 substituições veganas fáceis para o Veganuary 2026
- Os suplementos para dor nas articulações valem o seu dinheiro?
- Poderia a sua dieta ser o seu melhor segredo contra o envelhecimento?
- Dieta de fertilidade: o que comer quando você está tentando engravidar
- Sementes de linhaça: uma arma secreta para a saúde das mulheres?
- Chás de gengibre que fortalecem a saúde: modinha ou fato?
- Comidas saudáveis de Hanukkah para o seu peso, coração e diabetes
- Como um café da manhã rico em proteínas pode melhorar sua saúde
- Como aumentar seus níveis de vitamina D neste inverno
- Beber azeite faz bem para você?
- Gerenciando condições de saúde durante o Ramadã
- Concurso de Culinária de Natal do Paciente
- Sinais de que você não está bebendo água suficiente
- Compras no supermercado para alimentos que ajudam em articulações rígidas e doloridas
- Os 5 melhores alimentos probióticos para um intestino saudável
- O que são probióticos?
- Quais são os benefícios da vitamina E?
- O que é a dieta Ornish e ela pode transformar sua saúde?
- Quais vitaminas eu preciso?